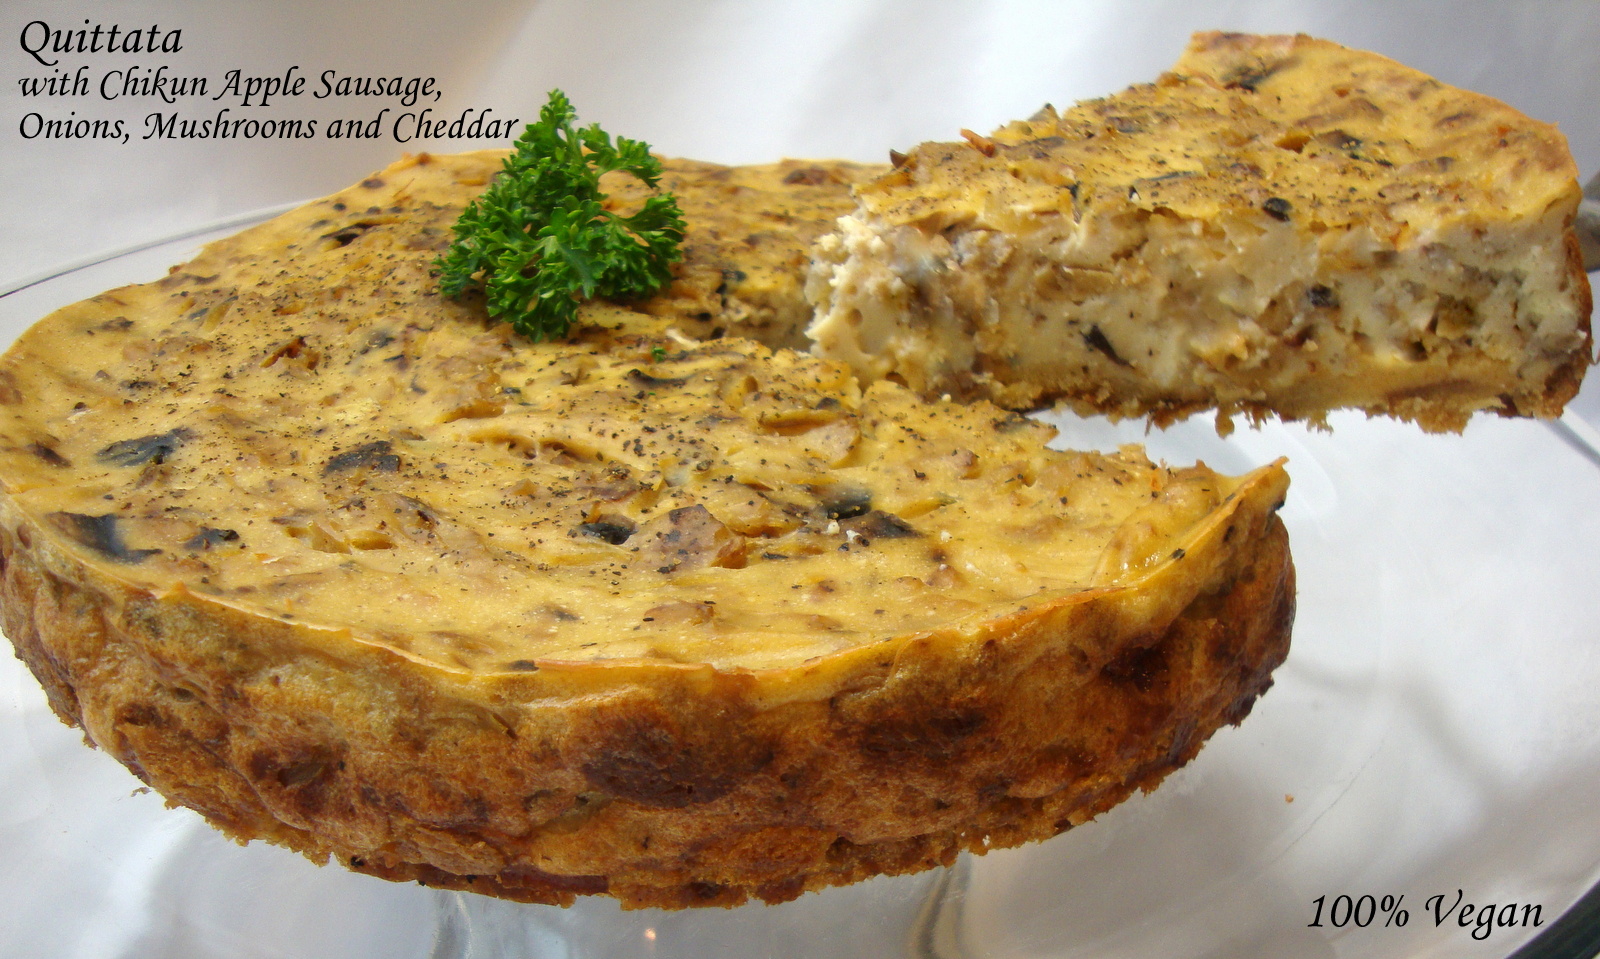
 A quittata is a hybrid of a frittata and a quiche. What makes this recipe unique, other than the fact that it’s 100% plant-based, is the savory bread crust (as opposed to using a traditional quiche pastry crust). Tender and flaky pastry crust can be difficult to prepare and personally I find them to be rather bland in flavor. The savory bread crust resolves that problem and requires no baking skills. As the quittata bakes, the exterior crust becomes nice and crispy while the interior remains moist and tender. And unlike a traditional pastry crust, it won’t crumble when sliced, which makes a much nicer presentation.
If you don’t have a springform pan, the quittata can be baked in a casserole dish or baking dish and served as a breakfast/brunch casserole. Seasonings and vegetables can be modified to suit your taste; just be sure any vegetables are cooked sufficiently to remove excess moisture before adding to the eggless custard mixture.
For a traditional eggless quiche or frittata, refer to the “Chef’s Tip” at the bottom of the recipe.
Ingredients for the Eggless Filling
• 2 cartons (12.3 oz. each) Mori-Nu™ extra-firm silken tofu, or similar
• 2 Tbsp olive oil
• ½ medium onion, diced
• 4 oz. mushrooms, any variety, sliced or chopped
• 8 oz. ground vegan sausage (or replace with vegetables of your choice)
• ½ tsp dried thyme
• ¼ tsp coarse ground black pepper
• 6 Tbsp cornstarch or unmodified potato starch
• 4 tsp nutritional yeast flakes
• ¾ tsp kala namak (Himalayan black salt)
Ingredients for the Savory Crust
• 5 to 6 oz. “day old” bread of your choice (about 6 slices, crust intact), cut into small cubes
• ¼ cup non-dairy butter or margarine, melted (plus additional for greasing the springform pan)
• 1 tsp dried marjoram
• ½ tsp dried thyme leaves
• ½ tsp sea salt or kosher salt
• ¼ tsp coarse ground black pepper
• 4 oz. shredded vegan cheese that melts (about 1 and ½ cup)
Additional Item
• 9-inch springform pan (or for a casserole use a baking dish or shallow casserole dish)
Technique
Drain the tofu and slice each block into 4 slabs. Place the slabs on a plate lined with several layers of paper towels or a lint-free kitchen towel to drain for a minimum of 20 minutes. After 20 minutes, blot the surface of the tofu with additional toweling to remove as much moisture as possible. This step is very important or the quittata will fail to set properly.
While the tofu is draining, prepare the crust and the filling. Generously grease the springform pan with butter or margarine and place the pan on a baking sheet. In large mixing bowl, toss the cubed bread with the melted butter, herbs, salt and pepper. Pack the bread mixture into the bottom of the springform pan. Sprinkle the shredded cheese over the top of the bread mixture. Set aside.
Preheat the oven to 375°F.
Add the olive oil to a skillet and place over medium heat. Add the onions, mushrooms, sausage (or vegetables), and a pinch or two of salt. Sauté until the mushrooms have completely released their moisture and the onions are beginning to caramelize. It is essential that the mixture be cooked thoroughly and the excess moisture evaporated or the quittata will fail to set properly. Stir in the thyme and black pepper and set aside to cool.
Crumble the silken tofu into a food processor. Add the starch, nutritional yeast and kala namak. Process the contents until smooth. Transfer the tofu mixture to the mixing bowl. Stir in the skillet mixture and mix thoroughly.
Spoon the filling over the bread and cheese mixture and smooth the surface with the back of the spoon; sprinkle with additional ground black pepper, if desired. Bake uncovered on the middle oven rack for about 1 hour and 10 minutes, or until the top of the quittata is golden. Let the quittata cool for about 15 to 20 minutes to allow it to “set” before removing from the springform pan and transferring to a serving plate. Slice and serve.
If the quittata needs to be reheated, cover securely with foil and heat in the oven at 350°F for 15 to 20 minutes. Slices can also be reheated in the microwave but this will make the crust a bit soggy.
Chef’s Tip: For a traditional eggless quiche, omit the savory bread crust and prebake a 9-inch pastry crust for about 15 minutes at 375°F. Layer 4 oz. of shredded cheese over the bottom of the crust. Add the eggless filling mixture and smooth the top. Bake uncovered on the middle oven rack for about 50 minutes or until golden. Let rest for 15 to 20 minutes to allow it to “set” before slicing and serving.
For a traditional eggless frittata, omit the crust entirely and spoon the eggless filling mixture into a greased 9-inch oven-safe stainless steel skillet or a tart pan with or without a removable bottom. Smooth the surface and top with 4 oz. shredded cheese. Bake at 375°F on the middle oven rack for about 50 minutes or until golden. Let rest for 15 to 20 minutes to allow it to “set” before slicing and serving.
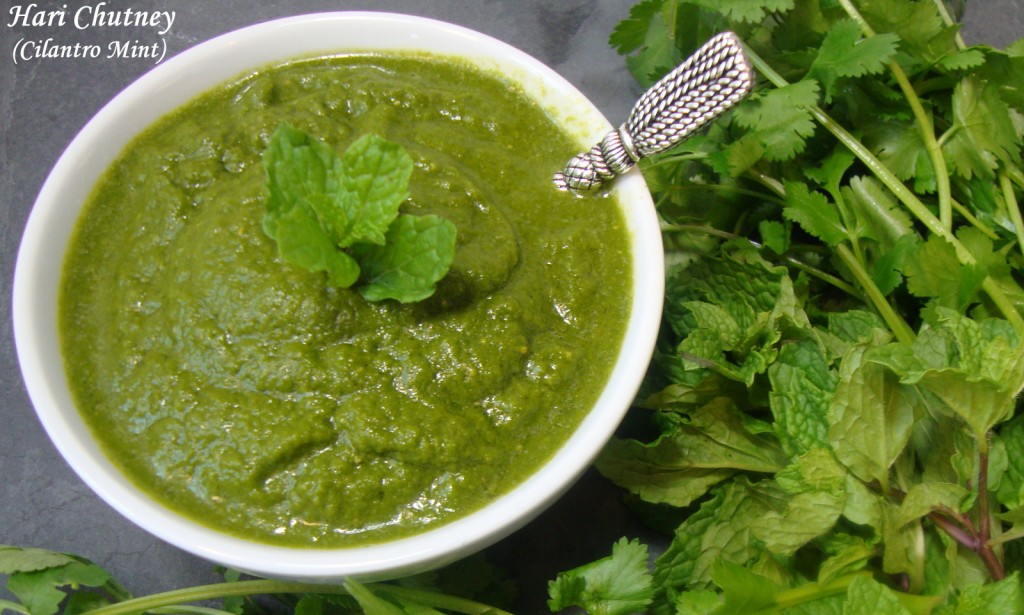 This bright green, tangy and refreshing Indian chutney is my absolute favorite condiment. Enjoy it with all Indian cuisine and as a spread or dip for samosa (deep-fried or baked pastry with savory filling), pakoras (Indian vegetable fritters) naan, papadum, roti and any and all other flatbreads and crackers. If you have a timid palate, start with ½ of the green chile and increase according to taste. Try mixing the chutney with plain non-dairy yogurt for a uniquely different salad dressing. It also adds wonderful flavor to non-dairy Crème Fraîche, sour cream and even eggless mayonnaise. The chutney will last about 1 week stored in the refrigerator; simply freeze any unused portion (try freezing in silicone molds or ice cube trays for easy use). This recipe yields about 1 and ¾ cup.
Ingredients
• 2 large bunches of cilantro (excess stems at bottom removed)
• 1 large handful of mint leaves (stems removed)
• 1 medium yellow onion, peeled and chopped
• 1 small green chile, seeded and chopped (or a large chile if you can take the heat)
• 1 clove garlic, peeled
• 2 T fresh lemon juice
• 1 tsp cumin seeds
• ¾ tsp sea salt or kosher salt, or more to taste
Technique
Process all ingredients in a blender until smooth. Season with additional salt to taste as desired. Store in an airtight container in the refrigerator.
Print Recipe
Hari Chutney (Cilantro Mint)
Votes: 0
Rating: 0
You:
Rate this recipe!
|
|
Votes: 0
Rating: 0
You:
Rate this recipe!
|
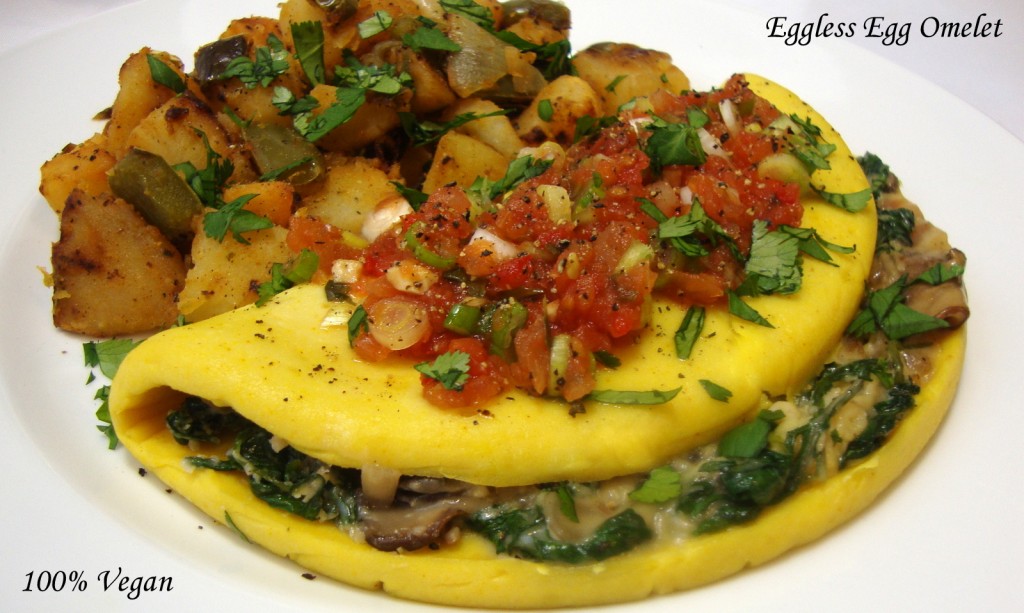 Fluffy and delicate eggless omelets can be filled with your choice of ingredients. The cooking technique has been simplified from earlier editions of my cookbook, which allows all omelets to be prepared and served at the same time. A standard 9-inch pie plate is required for each omelet (non-stick is not required). This recipe yields 2 omelets, so you will need 2 pie plates to prepare 2 omelets at the same time. For additional omelets, simply double or triple the recipe and use additional pie plates for each omelet (most large ovens can accommodate 6 pie plates with three on each rack). This is a foolproof method of preparation with no-risk of scorching or undercooking, so don’t be intimated to try it.
Ingredients
• 1 carton (12.3 oz.) Mori-Nu™ extra-firm silken tofu, or similar
• 3 Tbsp cornstarch or unmodified potato starch
• 1 Tbsp non-dairy butter (from my cookbooks) or commercial vegan margarine, softened or melted
• 1 T nutritional yeast flakes
• ½ tsp kala namak (Himalayan black salt) – or sea salt or kosher salt if you prefer
• ⅛ tsp onion powder
• ⅛ tsp sweet paprika
• ⅛ tsp turmeric
• fillings, toppings and garnishes of your choice
Tip: Cheese Melts (from The Non-Dairy Evolution Cookbook) work beautifully for omelets since the cheese is already melted. Shredded block cheeses (from the same cookbook) can be added to the cooked filling mixture while still warm to assist melting before filling the omelet.
Technique
Remove the tofu from the carton. Slice the tofu into 4 slabs and place the slabs on a plate lined with several layers of paper towels or a lint-free kitchen towel to drain for a minimum of 20 minutes. Firmly blot the tofu with additional towels to remove as much moisture as possible. This step is very important or the omelets will not set properly.
Crumble the tofu into a food processor* and add the starch, nutritional yeast, butter or margarine, kala namak, onion powder and turmeric. Process the contents until smooth. The ingredients will form a thick, pale cream (the egg color will develop when the mixture is cooked). Transfer the mixture to a bowl and set aside while the oven is preheated and any fillings are prepared.
*A blender can be used, but the mixture will be thick and difficult to retrieve from around the blades; therefore a food processor is recommended for ease of preparation.
Preheat the oven to 375°F/190°C. If using a convection oven, reduce the heat by 25°F/10°C.
When using vegetables that have high moisture content, such as mushrooms, spinach, zucchini, diced tomatoes, etc., be sure to sauté them until they have released most of their liquid. Transfer the vegetables and other fillings to a separate bowl and set aside. If using shredded cheese, mix the shreds with the warm filling to assist melting before filling the omelet.
Lightly mist the pie plate(s) with cooking oil spray. Add half of the mixture (about ¾ cup) to each plate. With the back of large spoon or flexible spatula, pat and spread the mixture evenly to the interior edges of the plate. Place the pie plates, uncovered, into the oven and bake for 10 minutes.
Test the omelets by touching the center; the center should feel dry to the touch. If it feels gooey, bake an additional minute or two until just dry to the touch. Remove from the oven and spoon the filling onto one side of the omelet. With a flexible spatula, carefully lift the opposite side of the omelet over the filling. Return the omelet(s) to the oven for 3 minutes.
Slide the omelet(s) onto a serving plate and top and/or garnish as desired. Serve immediately.
Print Recipe
Eggless Egg Omelets (New Method)
Votes: 8
Rating: 4.63
You:
Rate this recipe!
|
|
Votes: 8
Rating: 4.63
You:
Rate this recipe!
|
This recipe produces a velvety smooth cream cheese that rivals its commercial non-dairy counterparts; and since no culturing is involved, it’s much quicker to make than cultured non-dairy cream cheese (however, for a truly authentic and complex lactic flavor, I do recommend the cultured cashew-based Cream Cheese in my Non-Dairy Evolution Cookbook). The cheese mixture is very thick, therefore a high-powered blender is recommended for efficient processing.
Vegan lactic acid powder can be obtained from ModernistPantry.com. Please do not replace the soymilk with other non-dairy milks since the curdling reaction of the lactic acid with the soymilk is essential to the final texture. This recipe yields about 2 cups.
Ingredients
• ¾ cup (3.75 oz. by weight) whole raw cashews
• ½ cup organic plain unsweetened soymilk
• ½ block (about 7 oz. before pressing) firm or extra-firm tofu (not silken tofu)
• ¼ cup refined coconut oil
• 2 tsp lactic acid powder
• ½ tsp raw apple cider vinegar
• ½ tsp fine sea salt or kosher salt
Preparation
Rinse the cashews to remove any dust or debris and drain thoroughly. In a covered container, soak the cashews in the soymilk for a minimum of 8 hours in the refrigerator.
Press the tofu to remove as much moisture as possible.
Remove the lid from the coconut oil and place the jar or bottle into a microwave. Heat until melted (about 30 seconds to 1 minute depending upon the solidity of the coconut oil); avoid overheating the oil. Alternately, place the jar or bottle into a container filled with near boiling water and let stand until the oil melts. Measure ¼ cup.
Tip: Let the cashews, soymilk and tofu come to room temperature before blending as this will make processing easier.
Add the cashews, soymilk and coconut oil to a high-powered blender and process the contents on high speed until completely smooth and creamy, stopping to scrape down the sides of the blender jar and push the mixture down into the blades as necessary (the mixture will be very thick, so use a tamper tool if you have one).
Crumble the tofu into the blender and add the lactic acid, vinegar and salt. Continue to process on high speed until completely smooth and creamy, stopping to scrape down the sides of the blender jar and push the mixture down into the blades as necessary (the mixture will be extremely thick at this point, so use a tamper tool if you have one). Transfer the cheese mixture to a container with a lid and refrigerate until chilled.
Variations: For cream cheese with onion and chives, stir in 1 tablespoon dried minced onion and 1 tablespoon freeze-dried minced chives before chilling. For fruit flavored cream cheese, mix ¼ cup all-fruit jam into the cream cheese after it has chilled and firmed.
Print Recipe
Easy Cream Cheese (Tofu and Cashew Base)
Votes: 25
Rating: 3.84
You:
Rate this recipe!
|
|
Votes: 25
Rating: 3.84
You:
Rate this recipe!
|
Tofu-based sour cream has never appealed to me because I cannot tolerate the chalky undertaste; and uncultured cashew-based sour cream doesn’t work for me either because the natural sweetness of the cashews yields a product that is much too sweet for my liking (although it works in dessert applications). Cultured cashew-based sour cream, on the other hand, has a very accurate dairy sour cream flavor because the lacto-bacterial culture converts the natural sugar in the cashews into lactic acid, thus providing the authentic tanginess and eliminating the excessively sweet taste. However, preparing rejuvelac and culturing the cream takes several days and sometimes a quick alternative is appreciated.
It took some experimentation to achieve a texture and flavor that satisfied my taste, but I think this quick version makes an excellent alternative to its cultured counterpart. While this recipe still uses cashews to add body to the cream, the ratio of cashews is significantly reduced. Please note that there is no alternative to using soymilk in this recipe. Thickening is dependent upon the curdling action of soymilk when lactic acid is introduced. Other plant milks will not react to the acid in the same manner.
Vegan lactic acid powder can be purchased online from ModernistPantry.com. Citric acid powder can be used as an alternative to lactic acid powder but will not provide the same lactic dairy flavor. I don’t recommend lemon juice as an alternative acid for this recipe, since the water content in lemon juice will thin the texture too much. This recipe yields about 1 and ¾ cup sour cream.
Ingredients
• ¼ cup refined coconut oil
• ½ cup (2.5 oz.) whole raw cashews (pre-soaking is not necessary)
• 1 and ¼ cup organic plain unsweetened soymilk (sorry, no substitutes)
• ¼ tsp fine sea salt or kosher salt
• 1 and ½ tsp lactic acid
Preparation
Remove the lid from the coconut oil and place the jar or bottle into a microwave. Heat until melted (about 30 seconds to 1 minute depending upon the solidity of the coconut oil); avoid overheating the oil. Alternately, place the jar or bottle into a container filled with near boiling water and let stand until the oil melts. Measure the coconut oil and set aside.
Measure the lactic acid and set aside in a small dish.
Add the cashews, soymilk and salt to a high-powered blender, cover and process for 2 full minutes.
Remove the lid plug and with the blender running on high speed, add the coconut oil.
Reduce the speed to low and add the lactic acid powder. The cream will thicken instantly – turn the blender off. Do not continue to process once thickened.
Transfer the sour cream to an airtight container, seal and refrigerate for a minimum of 6 hours until well-chilled and further thickened. Consume within 10 days of preparation.
Print Recipe
Quick Non-Dairy Sour Cream
Votes: 37
Rating: 3.84
You:
Rate this recipe!
|
|
Votes: 37
Rating: 3.84
You:
Rate this recipe!
|
 A quittata is a hybrid of a frittata and a quiche. What makes this recipe unique, other than the fact that it’s 100% plant-based, is the savory bread crust (as opposed to using a traditional quiche pastry crust). Tender and flaky pastry crust can be difficult to prepare and personally I find them to be rather bland in flavor. The savory bread crust resolves that problem and requires no baking skills. As the quittata bakes, the exterior crust becomes nice and crispy while the interior remains moist and tender. And unlike a traditional pastry crust, it won’t crumble when sliced, which makes a much nicer presentation.


