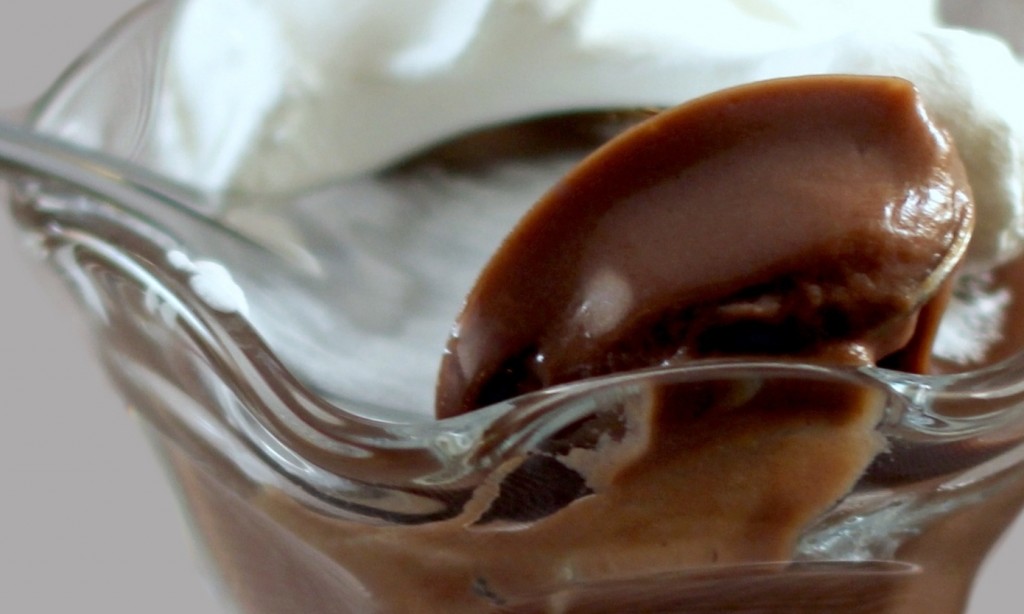
 Rich, creamy and delicious. This recipe yields about 3 cups or six ½ cup servings.
Ingredients
• ½ cup (2.5 oz. by weight) whole raw cashews (pre-soaking unnecessary)
• 2 and ½ cups non-dairy milk
• 2 T unmodified potato starch, cornstarch or arrowroot powder
• 1 cup organic sugar
• ⅓ cup unsweetened cocoa powder
• 2 tsp real vanilla extract
• ¼ tsp sea salt or kosher salt
Preparation
Place the strainer over a large glass bowl or BPA-free plastic storage container and set aside.
Add all ingredients to a blender and process on high speed for 2 full minutes. Stop to scrape down the sides of the blender as necessary.
Pour the mixture into a large saucepan and place over medium heat. Stir slowly and continually with a whisk. Whisk vigorously as the mixture begins to thicken (vigorous whisking will help to prevent lumps from forming). Continue whisking until the mixture begins to bubble.
Pour the mixture into the strainer over the container and stir with the whisk to press the mixture through the mesh. Cover the container with a lid or plastic wrap and let cool for about 15 minutes and then refrigerate for several hours until well-chilled.
To serve, stir the mixture thoroughly and spoon into individual dessert cups. Garnish the individual cups with non-dairy whipped cream, if desired.
Print Recipe
Milk Chocolate Pudding (non-dairy and egg-free, of course)
Votes: 3
Rating: 5
You:
Rate this recipe!
|
|
Votes: 3
Rating: 5
You:
Rate this recipe!
|
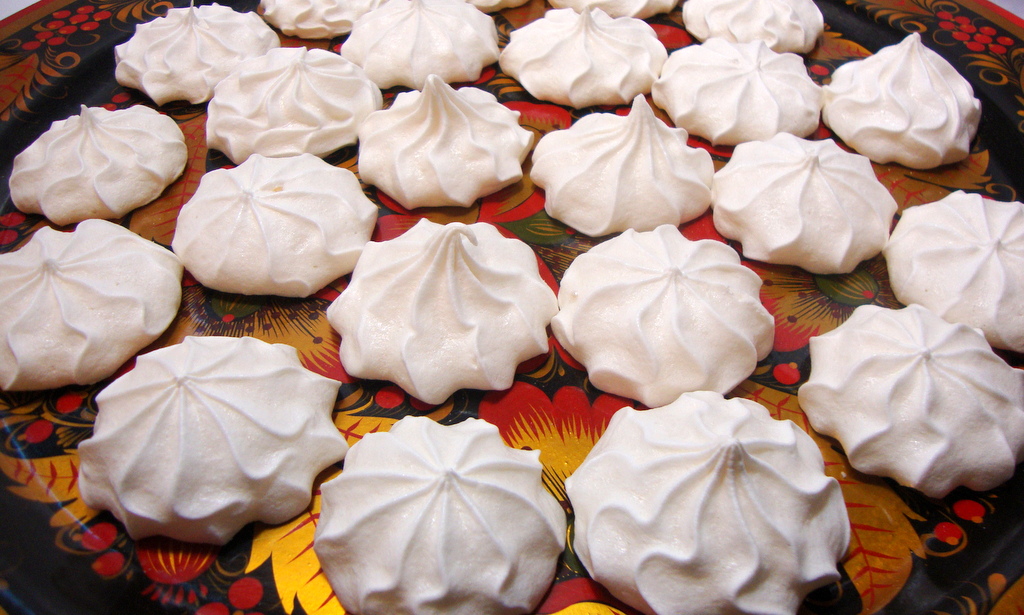 Crispy and light as air, these lemony drop cookies melt away on your tongue. A stand mixer with a balloon whip attachment is recommended for this recipe; however, an electric hand-held mixer will work if that is your only option. Do not use an immersion blender, standard blender or food processor, as the mixture needs to be whipped. This recipe yields about 48 one-inch diameter meringue drops.
Ingredients:
• 1 cup organic sugar
• 1 T Versawhip 600K™ (available from ModernistPantry.com)
• ½ tsp guar gum
• ¼ cup water
• ¼ cup fresh lemon juice
• ¼ tsp fine sea salt
Technique:
Add the sugar to a DRY blender and process into a fine powder. Set aside in a bowl.
Preheat the oven to 200°F.
Into the bottom of the mixer’s mixing bowl, stir together the Versawhip 600K™ with the guar gum, salt and approximately ⅓ of the finely powdered sugar. Add the water and lemon juice and turn on the mixer, gradually increasing the speed to high. Whip the mixture until stiff peaks begin to form, about 2 to 3 minutes.
Turn off the mixer and sprinkle in ½ of the remaining powdered sugar. Resume whipping for another 2 minutes. Turn off the mixer and add the remaining sugar. Resume whipping again for another 2 minutes.
Drop the meringue by teaspoonful, about 1-inch in diameter, onto a baking sheet lined with either parchment paper or a silicone baking mat (e.g., Silpat™). Alternately, the mixture can be decoratively piped onto the baking sheet using a pastry bag. Don’t spread the drops too far apart or you won’t be able to fit 24 onto a single sheet. Repeat on the second baking sheet.
Place the baking sheets in the oven and bake for 1 and ½ hours. After baking, let the meringue drops cool at room temperature for 1 hour on the baking sheet. This will ensure that the drops are sufficiently dry before storing in a covered container at room temperature. Do not attempt to touch them or move them until they have completely cooled.
Print Recipe
Lemon Meringue Drop Cookies
Votes: 0
Rating: 0
You:
Rate this recipe!
|
|
Votes: 0
Rating: 0
You:
Rate this recipe!
|
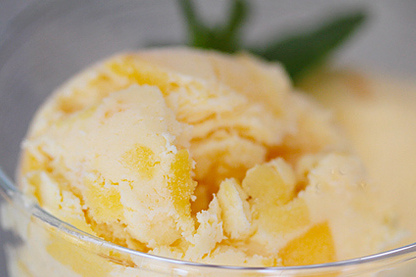
Heavy cashew cream and puréed fruit form the base for this delightful frozen treat. An ice cream maker is required for this recipe.
Ingredients:
• 1 cup (5 oz. by weight) whole raw cashews
• 2 cups non-dairy milk of your choice
• ¾ cup organic sugar
• ½ tsp guar gum
• 2 cups chilled fruit purée, smooth or semi-chunky
Technique:
Place the cashews and milk into a container with a lid, seal and place in the refrigerator to soak for a minimum of 8 hours. After soaking, place the ingredients in a high-powered blender and process on high speed for 2 full minutes.
The cream will now need to be strained to remove the solids. To do this, wash your hands thoroughly and pour the cream into the nut milk bag over a large bowl or pitcher.
While holding the top of the bag with one hand, gently knead the bag to help the cream pass through the ultra-fine mesh – avoid forcing the cream through. Discard or compost the solids in the bag.
Optionally, the cream can be poured (in increments) into a strainer lined with 4 layers of cheesecloth. Stir the cream gently with a spoon to help it pass through the cheesecloth.
Pour the heavy cream into a blender and add the sugar and guar gum; process until smooth. Pour the mixture into a container and refrigerate until very cold (or place in the freezer for about 30 minutes).
When well chilled, pour the cream mixture into your ice cream maker and add the chilled fruit purée. Process the mixture according to your ice cream maker’s instructions.
Print Recipe
Fresh Fruit Ice Cream (Cashew Cream Base)
Votes: 2
Rating: 5
You:
Rate this recipe!
|
|
Votes: 2
Rating: 5
You:
Rate this recipe!
|
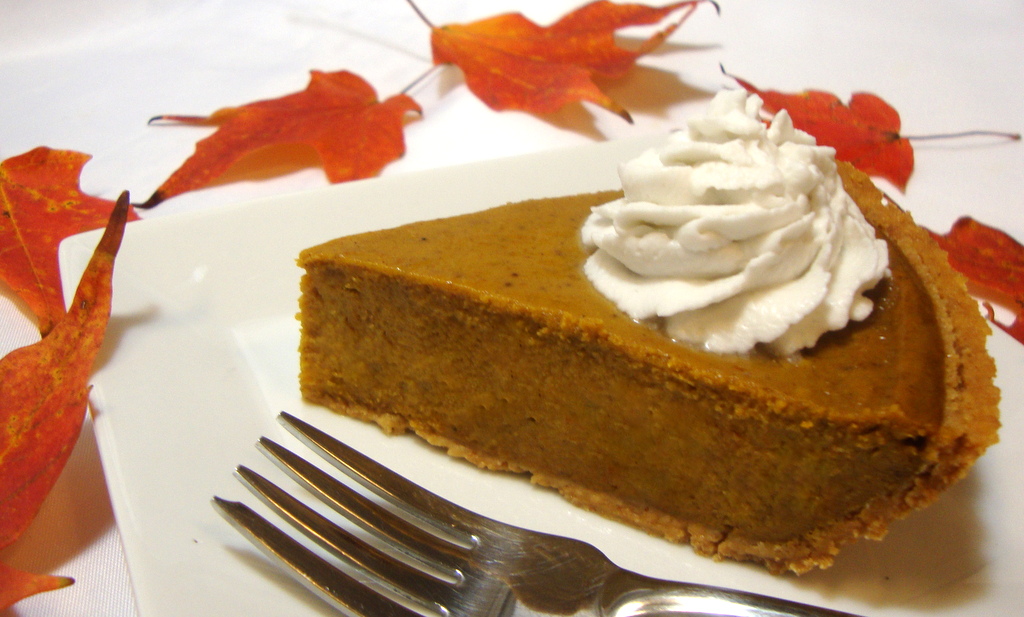
A favorite Autumn and Winter treat and perfect for celebrating the holidays. Vegan pumpkin pies are often made with tofu as a replacement for the evaporated milk and eggs. Although I use tofu frequently and successfully in eggless egg recipes and desserts, I find its undertaste to be rather noticeable and distracting in pumpkin pie. Therefore my goal was to create a pumpkin pie using a creamy cashew base which allows the flavor of the pumpkin and the warm spices to predominate.
Print Recipe
Classic Gentle Chef Pumpkin Pie
A favorite Autumn and Winter treat and perfect for celebrating the holidays. Vegan pumpkin pies are often made with tofu as a replacement for the evaporated milk and eggs. Although I use tofu frequently and successfully in eggless egg recipes and desserts, I find its undertaste to be rather noticeable and distracting in pumpkin pie. Therefore my goal was to create a pumpkin pie using a creamy cashew base which allows the flavor of the pumpkin and the warm spices to predominate.
Votes: 12
Rating: 4.5
You:
Rate this recipe!
|
|
Votes: 12
Rating: 4.5
You:
Rate this recipe!
|
Instructions
Soak the cashews in water in the refrigerator for about 8 hours to soften and hydrate. To expedite the soaking process, pour boiling water over the cashews and let soak for 1 hour.
Preheat the oven to 425°F.
Drain the cashews and add them to a high-powered blender. Add the non-dairy milk and process for 2 full minutes.
Add the remaining ingredients and process until completely smooth. The mixture will be quite thick, so occasionally stop to scrape down the sides of the blender with a spatula and stir the contents back down into the blades as necessary. Use a tamper tool if provided with your blender.
Spoon the mixture into the pie shell and smooth the surface with a spatula or large spoon. Don’t worry about a few swirl marks as they will minimize when the pie cools. Place the pie on the middle rack of the oven and bake for 15 minutes.
Reduce the heat to 350°F and continue to bake for an additional 50 to 55 minutes or until a toothpick inserted in the center of the pie comes out clean (do not exceed 60 minutes).
Note: The surface of the pie will appear dry after baking; this will resolve once cooled and chilled.
Remove the pie and cool completely on a wire rack (until the underside of the pie plate no longer feels warm). Loosely cover with plastic wrap and refrigerate until completely chilled and firm before slicing and serving. Try to avoid laying the plastic wrap in direct contact with the surface of the pie as moisture condensation will result. The pie can also be chilled in a large, sealable storage container.
Top individual slices with a dollop of non-dairy whipped cream, if desired.
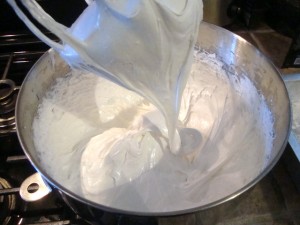
Yes, you heard correctly, sweet and gooey marshmallow creme without using egg whites. The secret ingredient to this deliciously spreadable confection is Versawhip 600K™, which is a modified form of soy protein. Versawhip 600K™ will need to be purchased through the internet and I recommend ModernistPantry.com as the source from which to order.
A stand mixer is REQUIRED for this recipe. The technique involves whipping molten hot sugar syrup, so do not attempt with a hand-held mixer or splattering can occur which can result in severe burns. Food processors, stand blenders or immersion blenders are not recommended for this recipe either as they will not work properly. So please don’t try it. It is also recommended that the stand mixer be equipped with a splatter shield to prevent the sticky marshmallow mixture from splattering out of the mixing bowl.
You will also need a candy thermometer to determine when the molten sugar syrup has reached the proper temperature. Light corn syrup is also required for this recipe and due to the concern about GMO products, a non-GMO light corn syrup is available by searching on the internet. This recipe yields about 4 cups.
Ingredients for the sugar syrup:
• ¼ cup water
• ⅓ cup light corn syrup
• 1 cup organic sugar
• pinch of sea salt
Ingredients for the fluff:
• ¼ cup water
• 1 and ½ tsp Versawhip 600K™
• ¼ tsp guar gum or xanthan gum
• ½ tsp real vanilla extract
Technique:
Attach a candy thermometer to the side of a small saucepan. Be sure the base of the thermometer rests just above the bottom of the pan without touching the metal.
Add the water, corn syrup and then the sugar into the center of the mixture. Swirl gently and place over medium-high heat. Do not stir while the sugar mixture is heating. The mixture will need to be boiled and brought to the “soft-ball candy” stage or 240°F. This will take several minutes.
While the sugar syrup is boiling, add the water to the bottom of the mixer’s bowl. Sprinkle in the Versawhip 600K™ and the guar gum or xanthan gum. Reserve the vanilla extract for later. Turn on the mixer and increase the speed to the highest setting. The mixture will whip into a voluminous white foam.
When the sugar syrup has reached 240°F, remove the saucepan from the heat and with the mixer running at high speed, pour the molten sugar syrup into the foam. Set a timer for 10 minutes while whipping at high speed. While the mixture is whipping, add the vanilla extract. That’s all that is necessary to make marshmallow creme. Transfer the marshmallow creme to a container with a lid and refrigerate until ready to serve.
Print Recipe
Marshmallow Creme
Votes: 8
Rating: 4
You:
Rate this recipe!
|
|
Votes: 8
Rating: 4
You:
Rate this recipe!
|
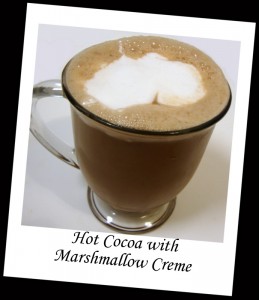
Kids will love this and your “inner child” will love it too. This recipe yields 4 cups or 1 quart of the finest chocolate cashew milk or hot cocoa. Chocolate cashew milk has a brief refrigerator storage life, so consume within 3 to 4 days (this has never been an issue in my home). Shake or stir well before serving.
For hot cocoa, gently heat in a saucepan on the stove – do not boil! Cashew milk makes a wonderful base for hot cocoa because it has a tendency to thicken slightly when heated. Top the hot cocoa with Marshmallow Creme (recipe in this blog) or Heavenly Whipped Cream (from my cookbooks) if desired.
Ingredients:
• 1 cup (5 oz. by weight) whole raw cashews
• 4 cups water
• ½ cup organic sugar, or more to taste
• ⅓ unsweetened cocoa powder
• 1 tsp real vanilla extract
• ½ tsp fine sea salt (optional)
You will also need a high-powered blender and a nut milk bag or fine mesh strainer lined with 4 layers of cheesecloth to strain any residual solids from the milk.
Technique:
Soak the nuts for a minimum of 8 hours in the refrigerator with enough water to cover. Drain the nuts, discarding the soaking water. Add the nuts to a high-powered blender with 4 cups of fresh water. Process the mixture on high speed for 2 full minutes.
The milk will now need to be strained to remove the solids. To do this, wash your hands thoroughly and then pour the milk into the nut milk bag over a large bowl or pitcher. While holding the top of the bag with one hand, gently knead and squeeze the bag to help the milk pass through the ultra-fine mesh.
Optionally, the milk can be poured (in increments) into a strainer lined with 4 layers of cheesecloth. Stir the milk gently with a spoon to help it pass through the cheesecloth.
Pour the strained milk back into the blender and discard or compost the solids in the bag or cheesecloth.
Add the sugar, cocoa powder, vanilla and salt to the blender and process until smooth. Store the milk in a covered container in the refrigerator until ready to serve or heat on the stove. Chocolate cashew milk has a tendency to separate, so shake well or stir before using.
Print Recipe
Chocolate Cashew Milk or Hot Cocoa
Votes: 1
Rating: 5
You:
Rate this recipe!
|
|
Votes: 1
Rating: 5
You:
Rate this recipe!
|