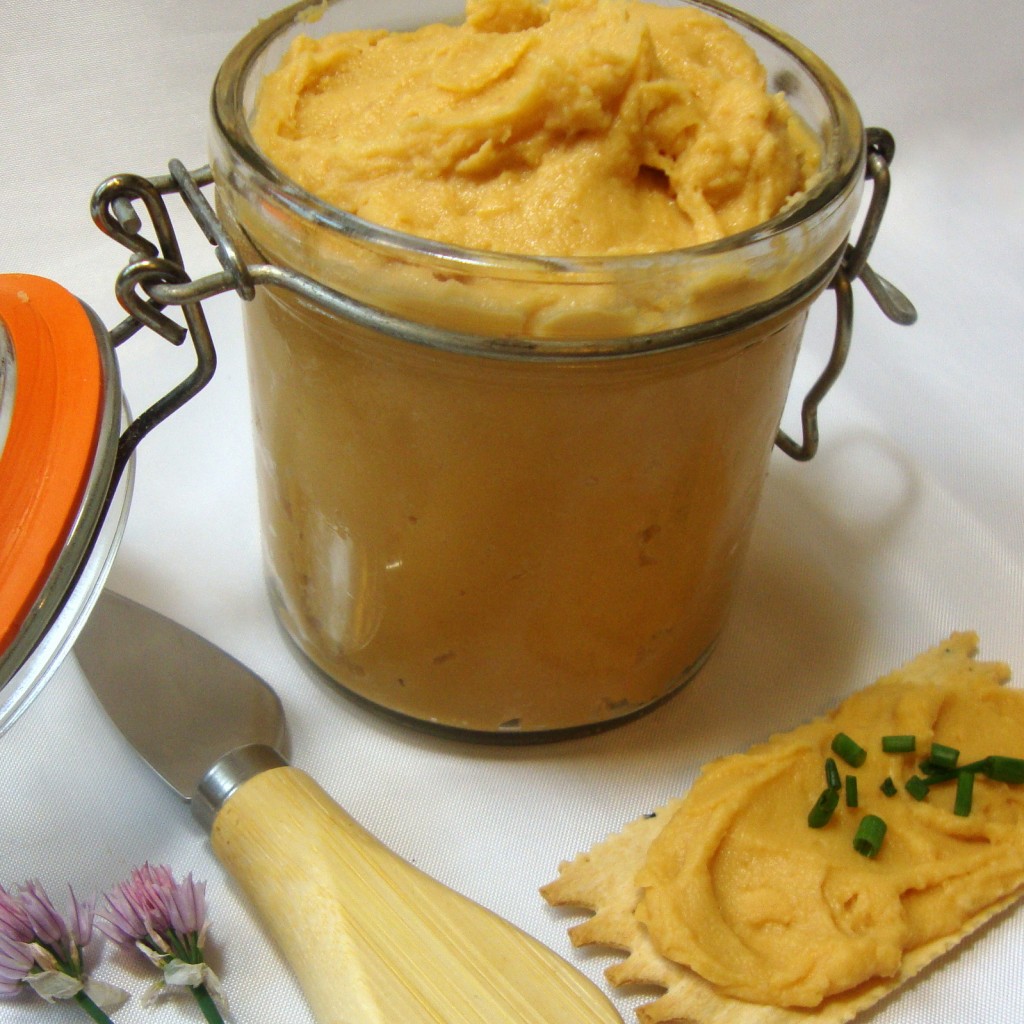
 Crock Beer Cheese is a spreadable sharp non-dairy cheddar enhanced with the flavor of beer. The beer is first reduced to eliminate the alcohol and a good portion of the water thus concentrating its flavor (the beer flavor is not a primary note in the cheese but rather contributes to the overall flavor profile). To spice things up, ground cayenne pepper can be added before cooking the cheese. For a robust cheese, prepared horseradish can be mixed into the cheese after it has set.
Crock Beer Cheese is superb for spreading on crackers, hard or soft pretzels or chunks of crusty bread. It can be melted on sandwiches or used in any application where spreadable sharp cheddar might be used.
Note: For this cheese, you will need a working understanding for preparing the Block Cheeses in the Non-Dairy Evolution Cookbook (see the main page of the TheGentleChef.com website for information on where to purchase the book). A cheese form is not required since the cheese will be stored in a crock or other suitable container. Any heat-proof container that will hold a minimum of 2 cups liquid will suffice for chilling and setting the cheese.
Ingredients
• 1 bottle (12 oz) beer of your choice, alcoholic or non-alcoholic
(please note that dark beers will darken the cheese)
• 1 T raw apple cider vinegar
• ½ tsp vegan lactic acid powder (available from ModernistPantry.com) or 2 tsp fresh lemon juice
• ½ cup refined coconut oil
• 1 cup organic plain unsweetened soymilk (no additives) or homemade almond milk
• ¼ cup tapioca flour
• ¼ cup nutritional yeast flakes
• 2 T mellow white miso paste
• 1 T tomato paste
• 2 tsp kappa carrageenan (available from ModernistPantry.com)
• 1 tsp fine sea salt or kosher salt
• 1 tsp dry ground mustard
• ½ tsp onion powder
• ½ tsp garlic powder
• optional: ¼ tsp ground cayenne pepper, or more to taste
• optional: 1 T prepared horseradish (not creamed) for stirring into the cheese after cooking and chilling
Technique:
First, gather all ingredients. Combine the vinegar with the lactic acid powder or lemon juice in a small dish and set aside near your cooking area. The acid mixture will be added to the cheese mixture after cooking.
Next, melt the coconut oil. Measure ½ cup and set aside.
In a medium saucepan, bring the beer to a simmer. Watch carefully while heating, as the beer will foam excessively and possibly boil over if brought to a vigorous boil. Skim and discard any excess foam. Simmer until reduced, about 15 minutes. Let the mixture cool until warm. Measure ⅓ cup and discard any remainder.
Transfer the beer reduction to a blender. Add the soymilk or almond milk with the remaining ingredients (except for the optional horseradish). Do not add the coconut oil or acid to the blender. Process the contents until smooth, stopping as necessary to dislodge any dry powder from the sides of the blender with a flexible spatula.
Now add the coconut oil (but not the acid) to the blender and pulse the mixture once or twice only to disperse the oil but not completely blend. This is important. After pulsing, pour the mixture into the saucepan.
Cook the cheese according to the Preparation and Cooking Technique instructions in the Block Cheese section of The Non-Dairy Evolution Cookbook. Be sure to incorporate the acid mixture into the cooked cheese before pouring into a minimum 2-cup container to set.
Cover with plastic wrap and chill for a minimum of 6 hours. After chilling, transfer the set cheese to a mixing bowl and mash and stir thoroughly with a fork until smooth. Stir in the optional prepared horseradish. Transfer to a crock or other suitable container and chill until ready to serve.
Print Recipe
Crock Beer Cheese (Non-dairy, of course)
Votes: 10
Rating: 4.8
You:
Rate this recipe!
|
|
Votes: 10
Rating: 4.8
You:
Rate this recipe!
|
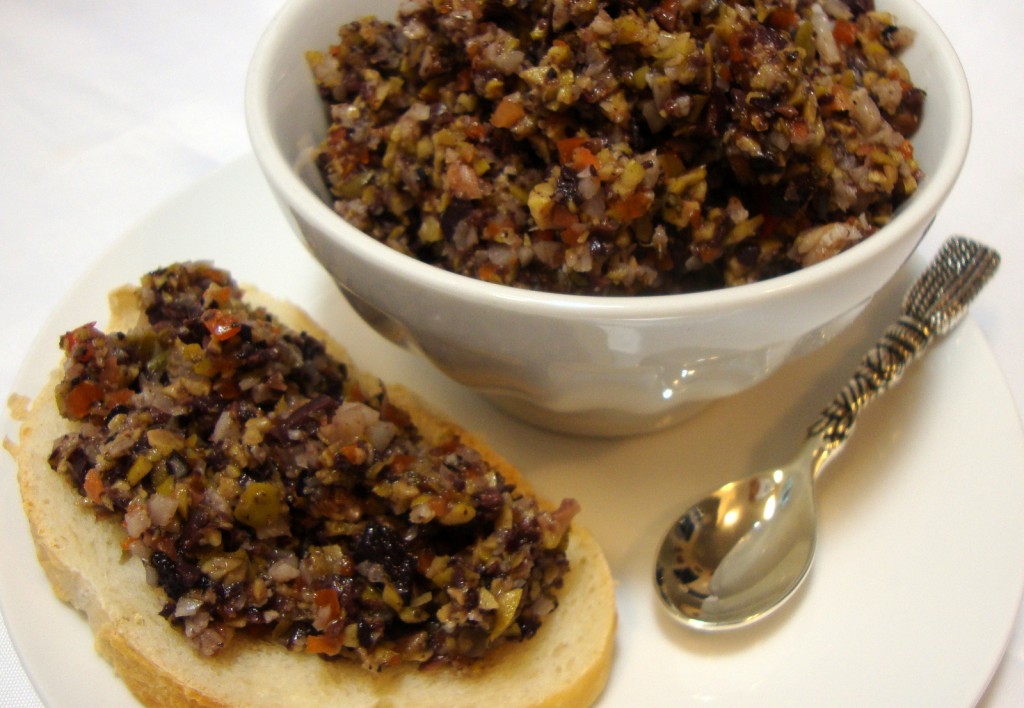 This recipe is my version of the mixed olive tapenade served on the famous New Orleans Muffuletta sandwich. Its bold Mediterranean flavors also pair well with hummus and baba ghannouj on crackers and crusty bread. Or try it on grilled eggplant sandwiches. Ideally it should be made a day in advance to give the flavors time to blend. Stored in an airtight container in the refrigerator, this spread will last for months.
Ingredients:
• 1 cup small pimento-stuffed olives, drained
• ½ cup small pitted Kalamata olives, drained
• ½ cup coarsely chopped Giardiniera (see recipe on this blog), or commercial equivalent
• 2 pepperoncini, stems removed
• 1 T capers, drained
• 2 cloves garlic, chopped
• 3 T olive oil
• 1 T red wine vinegar
• 1 tsp dried oregano
• ½ tsp coarse ground black pepper
Technique:
Place all ingredients in a food processor and pulse until coarsely chopped. Refrigerate to blend flavors before using.
Print Recipe
Olive Salad Spread
Votes: 3
Rating: 4.67
You:
Rate this recipe!
|
|
Votes: 3
Rating: 4.67
You:
Rate this recipe!
|
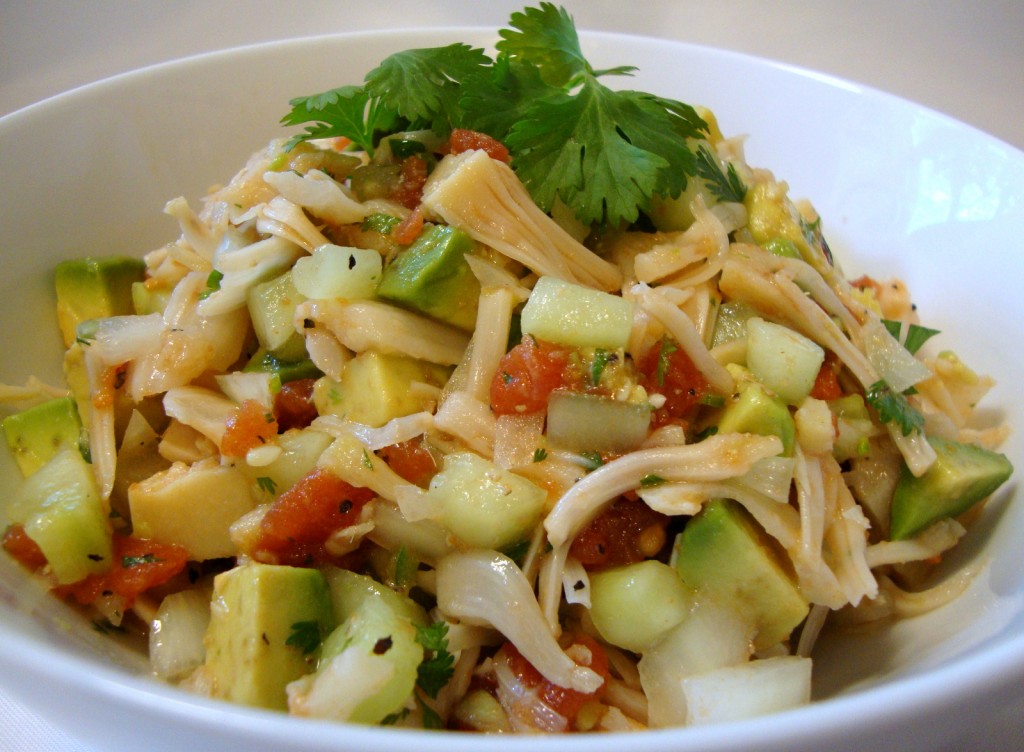 Ceviche (pronounced “seh-VEE-chay”) is a Latin American dish which traditionally consists of raw fish or shellfish marinated in citrus juice (usually lime and/or lemon juice). The acid in the citrus juice coagulates (denatures) the proteins in the seafood, effectively cooking it. Since no heat is used, the dish is served cold. There are many recipe variations combining the marinated fish/shellfish with a wide variety of other fresh ingredients such as onion, tomato, cilantro, chili peppers and avocado.
My plant-based version relies upon cooked unripe green jackfruit as a replacement for the fish/shellfish, since it has a neutral flavor which takes on the flavor of the marinade and a flaky texture reminiscent of cooked crab. The dish is essentially a zesty, marinated plant-based salad which is served cold as a refreshing appetizer with crispy corn tortilla chips. This recipe yields enough ceviche for 2 to 3 guests; for more simply multiply the recipe.
Ingredients:
• 1 can (20 oz) green jackfruit in water or brine
• ½ cup peeled and small diced tomato
• ½ cup peeled, seeded and small diced cucumber
• ¼ cup small diced onion
• ¼ cup chopped cilantro
• 1 clove garlic, minced
• 1 small Serrano chili, seeded and finely minced
• juice of 1 lime
• 1 T olive oil
• ½ tsp fine sea salt or kosher salt, or more to taste
• ¼ tsp coarse ground black pepper
• ¼ tsp ground cumin
• ½ ripe but firm avocado, diced
*Canned green jackfruit bears a resemblance to flaked crabmeat when cooked. It can be found in Indian and Asian markets or purchased through the internet. Look for the label “Green Jackfruit” or “Young Green Jackfruit” and be sure that it’s packed in water or brine and not syrup. Cans of ripe jackfruit packed in syrup may be stocked nearby, but don’t be tempted to substitute as the ripe fruit will be too sweet for this application.
Chef’s note: Traditional ceviche made with fresh seafood has a fresh, clean flavor and should not be fishy. If you wish to add a subtle ocean flavor to this plant-based version, add a little bit of dried kelp flakes or flaked, toasted nori.
Technique:
Drain the jackfruit and rinse. If the jackfruit was canned in brine, rinse thoroughly. Add the chunks of jackfruit to 1 quart salted boiling water. Reduce the heat to a slow boil and cook for 15 minutes. Drain in a colander and let cool. When cool enough to handle, remove the tough core from each chunk of jackfruit with a sharp knife and discard. Break the chunks apart with your fingers and remove the soft seeds and seed membranes and discard. The remaining flaky pulp is the only portion you will want to use in the dish, so sort through the chunks carefully (there will be a significant amount of unusable material). Wrap the pulp in a lint-free kitchen towel and squeeze to remove excess water. Coarsely chop the pulp and place in a mixing bowl.
Add the remaining ingredients EXCEPT for the avocado and toss well to combine. Refrigerate for several hours to marinate the ingredients and blend the flavors. Add the diced avocado just before serving and toss well. Season the ceviche with additional salt as desired and to taste. Serve with crunchy tortilla chips.
Votes: 4
Rating: 3.25
You:
Rate this recipe!
|
|
Votes: 4
Rating: 3.25
You:
Rate this recipe!
|
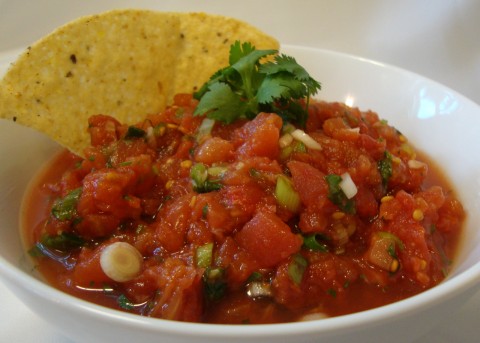
This fresh chunky garden salsa has a medium heat which can be adjusted to suit your taste. I chose canned whole tomatoes because they are partially stewed during the canning process, thus producing a superb texture for salsa. It’s very easy to make and so much better than store-bought. This recipe yields about 4 cups.
Ingredients:
• 2 cans (28 oz each) whole tomatoes
• 3 large scallions or 6 small scallions, white and green parts, finely chopped
• 2 large cloves garlic, finely minced (or 1 for timid palates)
• juice of 1 lime
• 1 small Serrano or jalapeno pepper, finely minced (about 1 T), or more to taste
(for a fiery salsa try including the seeds; for a milder salsa reduce or omit)
• ¼ cup chopped cilantro, or more to taste
• ¾ tsp fine sea salt or kosher salt, or more to taste
• ½ tsp ground cumin
Technique:
Remove the tomatoes from the can and finely dice, reserving any juice in the can for other uses, if desired. The tomatoes themselves contain a great deal of juice, so use a cutting board with irrigation channels if you have one; if not, dice 1 or 2 tomatoes at a time. Place the diced tomatoes in a mixing bowl and toss together with the remaining ingredients. Refrigerate for several hours to blend the flavors, ideally overnight.
Taste and add additional salt before serving, as desired. The salsa will keep for about 10 days in the refrigerator. Serve with your favorite tortilla chips; or use as a topping for your favorite Mexican or Tex-Mex recipes.
Print Recipe
Chef’s Favorite Garden Salsa
Votes: 0
Rating: 0
You:
Rate this recipe!
|
|
Votes: 0
Rating: 0
You:
Rate this recipe!
|

A zesty and cheesy Southwestern bean dip served hot with your favorite chips or bread for dipping.
Ingredients:
• 1 can (15 oz) or 2 cups cooked white beans (cannellini, navy or Great Northern)
• mild-flavor cooking oil
• 3 large jalapenos, seeded and diced
• 1 large Anaheim chili, seeded and diced or 1 can (4 oz) diced mild green chilies
• ½ medium onion, diced
• 3 cloves garlic, minced
• 1 and ¾ cup non-dairy milk (soymilk works best)
• ¼ cup tapioca flour (starch)
• 2 T nutritional yeast flakes
• 1 T mellow white miso paste
• 2 tsp fine sea salt or kosher salt
• 2 tsp lactic acid powder or 2 T fresh lemon juice
• 2 tsp apple cider vinegar
• ½ cup panko bread crumbs or plain, dry breadcrumbs
*Note: Use protective gloves when handling jalapeno peppers; or wash your hands thoroughly several times after handling.
Technique:
If using canned beans, rinse thoroughly until all traces of foam disappear. Drain well and set aside.
Preheat the oven to 375°F. Grease a small, shallow baking dish with cooking oil and set aside.
Add 2 tablespoons of cooking oil to a skillet and place over medium-low heat. Add the jalapeno, fresh Anaheim chili, onion and garlic with a pinch of salt and “sweat” the vegetables until softened (if using canned mild green chilies, set aside for later).
If using canned green chilies, add them at this time. Increase the heat to medium and sauté until any liquid has evaporated and the onions are translucent and lightly golden – do not brown. Transfer to a mixing bowl to cool.
In a small saucepan, whisk together the non-dairy milk, tapioca flour, nutritional yeast, miso, salt and acids. Whisk in 2 tablespoons of cooking oil and place over medium-low heat. Cook, stirring frequently, until the mixture is hot, cheesy, bubbly and smooth (the cheese sauce will be somewhat salty at this stage but will balance out when mixed with the bean purée and vegetables). Keep warm over low heat.
Place the white beans into a food processor and process into a paste. Alternately, mash the beans thoroughly with a potato masher or ricer. Transfer to the mixing bowl.
Add the cheese mixture to the mixing bowl and stir all ingredients thoroughly. Transfer to the greased baking dish, spread evenly and top with the panko crumbs. Season the topping with coarse ground black pepper and mist with cooking oil spray. The oil will help the crumbs brown in the oven.
Place on the middle rack of the oven and bake uncovered for 45 to 50 minutes or until browned and bubbly. To enhance browning if necessary, place under the broiler for about 1 minute.
Serve hot with warm tortilla chips, chunks of crusty bread or crackers. The dip will be saucy when very hot but will thicken substantially as it cools.
Print Recipe
Cheesy Jalapeno Popper Bean Dip
Votes: 2
Rating: 5
You:
Rate this recipe!
|
|
Votes: 2
Rating: 5
You:
Rate this recipe!
|

Golden brown and crispy on the outside and tender and delicious on the inside, these savory and generously spiced polenta fries are served with a tangy, citrusy sauce for dipping.
Ingredients for the polenta:
• 3 cups water
• 1 T vegan butter or margarine
• 1 tsp sea salt or kosher salt
• 1 cup yellow cornmeal (preferably non-GMO)
• 1 T dried minced chives or 2 T fresh
• 2 tsp onion powder
• 1 tsp garlic powder
• 1 tsp ancho chili powder (or any mild chili powder)
• ½ tsp dried oregano
• ½ tsp ground cumin
• ¼ tsp chipotle chili powder
Ingredients for the aioli:
• ½ cup vegan mayonnaise
• 2 T fresh chopped cilantro
• 2 tsp fresh lime juice, or to taste
• sea salt and fresh ground black pepper, to taste
Technique:
Lightly oil a 9×5-inch loaf pan; set aside.
In a medium saucepan, bring the water, butter or margarine and salt to a boil.
In large measuring cup, mix together the cornmeal and remaining ingredients.
When the water comes to a boil, reduce the heat to medium-low. While vigorously whisking, SLOWLY pour the cornmeal mixture into the simmering water. Slow addition of the cornmeal with vigorous stirring ensures that the corn meal does not form solid lumps. If lumps form, keep whisking until they break apart.
Cook, stirring frequently, until the mixture is thick and begins to pull away from sides of saucepan. The mixture will cook quickly.
Spoon the cornmeal mixture into the loaf pan and smooth the top with the back of a spoon or rubber spatula. Let the mixture cool for about 15 minutes and then place plastic wrap directly in contact with the surface; refrigerate for 6 to 8 hours or until firm.
In the meantime, prepare the aioli by mixing together the ingredients in a small bowl. Cover and refrigerate until ready to serve.
Once the polenta has chilled and firmed, turn the cake onto a work surface. Cut the cake in half and then cut each half into “fries” or wedges (or any shape you desire). Deep fry the polenta in hot oil until golden brown and crispy. The polenta will take longer to brown than potato fries. Drain on a plate lined with several paper towels. Serve hot with the aioli.
Print Recipe
Southwestern Polenta Crispy Fries with Cilantro Lime Aioli
Votes: 0
Rating: 0
You:
Rate this recipe!
|
|
Votes: 0
Rating: 0
You:
Rate this recipe!
|